# 17.5:首页面布局
首页面是项目启动后显示的第一个页面,它包含标题栏,计算列表和键盘,本节笔者简单介绍一下首页布局的实现。
# 17.5.1:标题栏布局
标题栏布局笔者直接复用第九章 第 3 节 介绍过的自定义组件 TitleBar ,代码如下所示:
TitleBar({titleBarAttribute: {
  backShow: true,
  backIcon: $r("app.media.icon_menu"),
  backCallback: () => {
    // 点击菜单,打开设置页面
  },
  title: "极简计算器",
  menuShow: true,
  menuIcon: $r("app.media.icon_share"),
  menuCallback: () => {
    // 分布式操作,拉起远端 FA
  }
}})
2
3
4
5
6
7
8
9
10
11
12
13
组件 TitleBar 左侧菜单图标点击时跳转到设置页面,右侧分享图标点击时拉起远端 FA 进行协同计算。组件 TitleBar 运行结果如下图所示:

# 17.5.2:键盘布局
键盘布局主要借助 Grid 组件实现一个 5 * 4 的表格布局,笔者基于 Grid 自定义了键盘组件 CalculatorGrid ,它负责响应用户的点击并记录用户的输入表达式,根据用户的输入表达式计算出结果,最后把结果回调出来,代码如下所示:
import {Symbols} from '../modules/symbols'
import {Calculator} from '../modules/calculator'

@Component export struct CalculatorGrid {

  callback: (expression: string, result: string) => void;           // 对外的事件回调

  private screenWidth: number = px2vp(1080);                        // 屏幕宽度
  private rowSpace: number = 10;                                    // 行间距
  private rowCount: number = 5;                                     // 行数
  private columnSpace: number = 15;                                 // 列间距
  private columnCount: number = 4;                                  // 列数
  private itemSize: number = 0;                                     // Item尺寸
  private items: Array<ItemAttribute> = [];                         // 按键集合
  private calculator: Calculator = null;                            // 负责计算表达式

  build() {
    Grid() {
      ForEach(this.items, (item: ItemAttribute, index: number) => { // ForEach语法
        GridItem() {
          Text(item.fontText)
            .fontSize(item.fontSize)
            .fontColor(item.fontColor)
            .id("index" + index)
        }
        .width('100%')
        .height('100%')
        .backgroundColor(item.bgColor)
        .borderRadius(this.itemSize)                                // 设置圆角
        .rowStart(index == 15 ? 3 : 0)                              // 第16个GridItem占用2行
        .rowEnd(index == 15 ? 4 : 0)                                // 第16个GridItem占用2行
        .columnStart(index == 16 ? 0 : 0)                           // 第17个GridItem占用2列
        .columnEnd((index == 16 ? 1 : 0))                           // 第17个GridItem占用2列
        .onClick(() => {
          this.calculator.onItemClicked(item.fontText)
        })
      })
    }
    .padding({left: this.columnSpace, right: this.columnSpace})
    .columnsTemplate("1fr 1fr 1fr 1fr")                             // Grid宽度均分成4份
    .rowsTemplate("1fr 1fr 1fr 1fr 1fr")                            // Grid高度均分成5份
    .rowsGap(this.rowSpace)                                         // 设置行间距
    .columnsGap(this.columnSpace)                                   // 设置列间距
    .width('100%')
    .height(this.itemSize * this.rowCount + this.rowSpace * (this.rowCount - 1))
  }

  aboutToAppear() {
    this.itemSize = (this.screenWidth - (this.columnSpace * (this.columnCount + 1))) / this.columnCount;               // Item尺寸
    this.items = ItemAttribute.mock();
    this.calculator = new Calculator((expression: string, result: string) => {
      this.callback?.call(this, expression, result);
    });
  }
}

class ItemAttribute {

  constructor(public fontText: string, public fontSize: number = 26, public fontColor: string = "#ffffff", public bgColor: string = "#aabbcc") {}

  public static mock(): Array<ItemAttribute> {
    let items = new Array<ItemAttribute>();
    items.push(new ItemAttribute(Symbols.SYMBOL_CLEAR, 26, "#010101", "#949494"));
    // ……
    items.push(new ItemAttribute(Symbols.SYMBOL_DOT, 26, "#ffffff", "#262626"));
    return items;
  }
}
2
3
4
5
6
7
8
9
10
11
12
13
14
15
16
17
18
19
20
21
22
23
24
25
26
27
28
29
30
31
32
33
34
35
36
37
38
39
40
41
42
43
44
45
46
47
48
49
50
51
52
53
54
55
56
57
58
59
60
61
62
63
64
65
66
67
68
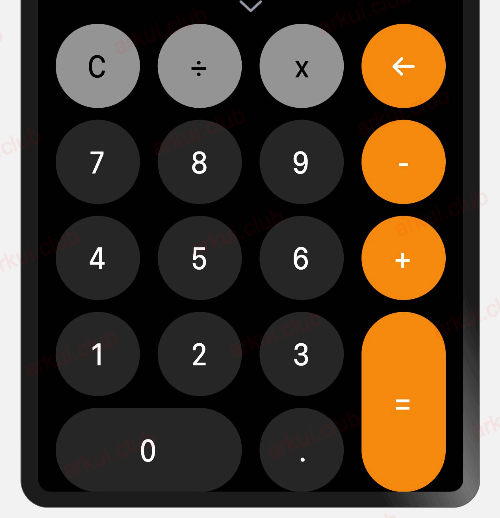
CalculatorGrid 的布局实现核心就是利用了 Grid 控件的 columnsTemplate 和 rowsTemplate 属性实现 5 * 4 的排列, 0 和 = 实现占用 2 格是利用 GridItem 的 rowStart 和 rowEnd , columnStart 和 columnEnd 实现的,这块需要读者掌握了各属性的用法。
CalculatorGrid 的布局里边引入了 Symbols 和 Calculator , Symbols 定义了一系列按键常量, Calculator 实现输入内容的计算和输出。
ItemAttribute 封装了按键的一些基本属性,比如按钮显示文字,文字大小,文字颜色等。简单的按键集合在 CalculatorGrid 。
📢: CalculatorGrid 的布局使用的 screenWidth 屏幕宽度目前是写死的,因为 OpenHarmony 的预览器暂不支持获取屏幕的宽度,实际项目中可以使用 '@ohos.display' 模块下的 getDefaultDisplay 实现,代码如下:
display.getDefaultDisplay((error, display) => {
  if(display) {
    if(typeof(display.width) == "number") {
      console.log("get display success: " + display.width);
    }
  } else {
    console.log("get display error")
  }
});
2
3
4
5
6
7
8
9
代码运行结果如下图所示:
# 17.5.3:计算列表布局
计算列表由一个 List 控件组成,它负责展示用户输入的表达式和计算结果,代码如下所示:
List({scroller: this.listScroller}) {
  // LazyForEach()
  ForEach(this.expressions, (item: string, index?: number) => {
    ListItem() {
      Text(item)
        .fontSize(30)
        .fontColor(Color.White)
        .textAlign(TextAlign.End)
        .padding({ top: 5, bottom: 5, right: 5})
        .width("100%")
    }
    .width("100%")
  }, (item: string, index?: number) => {
    return item + index;
  });
}
.divider({
  strokeWidth: 0.5,
  color: "#ffffff"
})
.layoutWeight(1)
.width('100%')
2
3
4
5
6
7
8
9
10
11
12
13
14
15
16
17
18
19
20
21
22
📢:为了演示效果,笔者暂时使用 ForEach 生成每一个 ListItem ,正式项目中为了节省资源应该使用 LazyForEach 实现。
# 17.5.4:整体运行效果
首页面整体页面布局如下所示:
@Entry @Component struct Index {

  @State arrowDown: boolean = true;
  @State result: string = "0";
  @State expressions: Array<string> = new Array<string>();

  private inputScroller: Scroller = new Scroller();
  private listScroller: Scroller = new Scroller();
  private saveController: CustomDialogController = null;

  build() {
    Column() {

      TitleBar({titleBarAttribute: {
        backShow: true,
        backIcon: $r("app.media.icon_menu"),
        backCallback: () => {
          Logger.log("left click")
        },
        title: "极简计算器",
        menuShow: true,
        menuIcon: $r("app.media.icon_share"),
        menuCallback: () => {
          Logger.log("right click")
        }
      }})

      Text()
        .width('100%')
        .height("2px")
        .backgroundColor("#ffffff")

      List({scroller: this.listScroller}) {
        // LazyForEach()
        ForEach(this.expressions, (item: string, index?: number) => {
          ListItem() {
            Text(item)
              .fontSize(30)
              .fontColor(Color.White)
              .textAlign(TextAlign.End)
              .padding({ top: 5, bottom: 5, right: 5})
              .width("100%")
          }
          .width("100%")
        }, (item: string, index?: number) => {
          return item + index;
        });
      }
      .divider({
        strokeWidth: 0.5,
        color: "#ffffff"
      })
      .layoutWeight(1)
      .width('100%')

      if (this.arrowDown) {
        Scroll(this.inputScroller) {
          Text(this.result)
            .height(60)
            .fontSize(40)
            .fontColor(Color.White)
            .maxLines(1)
            .textAlign(TextAlign.End)
            .textOverflow({overflow: TextOverflow.None})
            .padding({left: 5, right: 5})
        }
        .align(Alignment.End)
        .scrollable(ScrollDirection.Horizontal)
        .scrollBar(BarState.Off)
        .width('100%')
        .height(65)
      }

      Image(this.arrowDown ? $r("app.media.icon_arrow_down") : $r("app.media.icon_arrow_up"))
        .width(20)
        .height(30)
        .onClick(() => {
          this.arrowDown = !this.arrowDown;
        })

      if (this.arrowDown) {
        CalculatorGrid({
          callback: (result: string, expression: string) => {
            this.result = result;
            this.inputScroller.scrollEdge(Edge.End);
            if(expression) {
              this.expressions.push(expression + "=" + result);
              this.listScroller.scrollToIndex(this.expressions.length - 1);
              Logger.log(expression + "=" + result);
            }
          }
        })
      } else {
        Row() {
          Text("存档")
            .height("100%")
            .layoutWeight(1)
            .fontSize(24)
            .fontColor(Color.Black)
            .textAlign(TextAlign.Center)
            .backgroundColor("#aabbcc")
            .onClick(() => {
              this.saveController.open();
            })
          Text("清空")
            .height("100%")
            .layoutWeight(1)
            .fontSize(24)
            .fontColor(Color.White)
            .textAlign(TextAlign.Center)
            .backgroundColor($r("app.color.main_theme"))
            .onClick(() => {
              this.expressions.splice(0, this.expressions.length);
              this.result = "0";
            })
        }
        .width("100%")
        .height(60)
        .backgroundColor("#aabbcc")
      }
    }
    .backgroundColor('#010101')
    .width('100%')
    .height('100%')
  }

  aboutToAppear() {
    this.saveController = new CustomDialogController({
      builder: SaveExpressionDialog(),
      autoCancel: true,
      customStyle: true,
      alignment: DialogAlignment.Bottom
    });
  }

  onBackPress() {
    Logger.log("onBackPress")
    return BackPressUtils.onBackPress();
  }

}
2
3
4
5
6
7
8
9
10
11
12
13
14
15
16
17
18
19
20
21
22
23
24
25
26
27
28
29
30
31
32
33
34
35
36
37
38
39
40
41
42
43
44
45
46
47
48
49
50
51
52
53
54
55
56
57
58
59
60
61
62
63
64
65
66
67
68
69
70
71
72
73
74
75
76
77
78
79
80
81
82
83
84
85
86
87
88
89
90
91
92
93
94
95
96
97
98
99
100
101
102
103
104
105
106
107
108
109
110
111
112
113
114
115
116
117
118
119
120
121
122
123
124
125
126
127
128
129
130
131
132
133
134
135
136
137
138
139
140
141
笔者在 onBackPress() 方法添加了一个 再按一次退出应用 的功能,这是利用了组件声明周期实现的,有对组件生命周期不熟悉的小伙伴可以看下第九章 第 1 节 的内容。
首页运行效果如下图所示:
以上就是《极简计算器》项目首页的实现效果,笔者只是大致介绍了 UI 布局,读者可阅读 Gitee 上的源码查看具体实现。