# 3.9:形状剪切
ArkUI开发框架提供的组件继承自 CommonMethod ,因此在 CommonMethod 中的定义的属性是组件的公共属性,本节笔者向读者介绍一下项目中最常用的剪切类属性,读者也可自行查看 CommonMethod 的源码了解其它剪切属性。
# 3.9.1:遮罩设置
export declare class CommonMethod<T> {
  // 添加遮罩
  mask(value: Circle | Ellipse | Path | Rect): T;
}
2
3
4
mask:给当前组件添加指定形状的遮罩,遮罩的参考系为当前组件的左上角坐标,为了使遮罩显示还必须调用
fill()方法添加遮罩颜色。参数说明如下:Circle:添加圆形遮罩,样例如下:
Image($r("app.media.test")) // 默认图片
  .width(160)
  .height(90)

Image($r("app.media.test")) // 居左剪切出一个圆
  .width(160)
  .height(90)
  .mask(new Circle({width: 90, height: 90}).fill(Color.Pink))

Image($r("app.media.test")) // 居中剪切出一个圆
  .width(160)
  .height(90)
  .mask(new Circle({width: 160, height: 90}).fill(Color.Pink))

Image($r("app.media.test")) // 居右剪切出一个圆
  .width(160)
  .height(90)
  .mask(new Circle({width: 230, height: 90}).fill(Color.Pink))
1
2
3
4
5
6
7
8
9
10
11
12
13
14
15
16
17
18@Entry @Component class MyView { func build() { Column(10) { Image(@r(app.media.test_icon)) // 默认图片 .width(160) .height(90) Image(@r(app.media.test_icon)) // 居左剪切出一个圆 .width(160) .height(90) .mask(CircleShape(width: 90, height: 90).fill(Color(0xffc0cb))) Image(@r(app.media.test_icon)) // 居中剪切出一个圆 .width(160) .height(90) .mask(CircleShape(width: 160, height: 90).fill(Color(0xffc0cb))) Image(@r(app.media.test_icon)) // 居右剪切出一个圆 .width(160) .height(90) .mask(CircleShape(width: 230, height: 90).fill(Color(0xffc0cb))) } .padding(10) .width(100.percent) .height(100.percent) } }1
2
3
4
5
6
7
8
9
10
11
12
13
14
15
16
17
18
19
20
21
22
23
24
25
26
27样例运行结果如下图所示:
Ellipse:添加椭圆形遮罩,样例如下:
Image($r("app.media.test"))
  .width(160)
  .height(90)

Image($r("app.media.test"))
  .width(160)
  .height(90)
  .mask(new Ellipse({width: 160, height: 90}).fill(Color.Pink))

Image($r("app.media.test"))
  .width(160)
  .height(90)
  .mask(new Ellipse({width: 90, height: 90}).fill(Color.Pink))
1
2
3
4
5
6
7
8
9
10
11
12
13@Entry @Component class MyView { func build() { Column(10) { Image(@r(app.media.test_icon)) .width(160) .height(90) Image(@r(app.media.test_icon)) .width(160) .height(90) .mask(EllipseShape(width: 160, height: 90).fill(Color(0xffc0cb))) Image(@r(app.media.test_icon)) .width(160) .height(90) .mask(EllipseShape(width: 90, height: 90).fill(Color(0xffc0cb))) } .padding(10) .width(100.percent) .height(100.percent) } }1
2
3
4
5
6
7
8
9
10
11
12
13
14
15
16
17
18
19
20
21
22样例运行结果如下图所示:
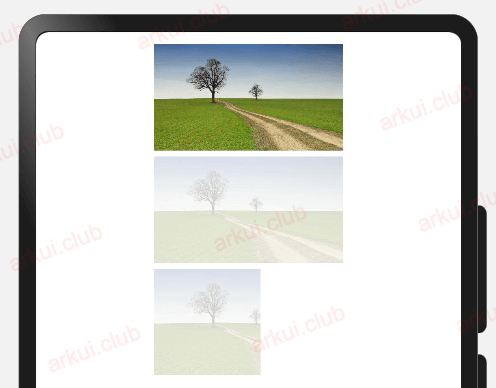
Path:在指定路径上添加遮罩,
Path使用commands才生效果,样例如下:Image($r("app.media.test")) // 默认图片 .width(160) .height(90) Image($r("app.media.test")) // 使用commands参数起作用 .width(160) .height(90) .mask(new Path({commands: "M0 0 L150 0 L300 150 L0 300 Z"}).fill(Color.Red)) Image($r("app.media.test")) // 不使用commands不起作用 .width(160) .height(90) .mask(new Path({width: 100, height: 90}).fill(Color.Red)) Image($r("app.media.test")) // 使用commands参数起作用 .width(160) .height(90) .mask(new Path({width: 80, height: 45, commands: "M0 0 L" + vp2px(80) + " 0 L" + vp2px(80) + " " + vp2px(45) + " L0 " + vp2px(45) + " Z"}).fill(Color.Red))1
2
3
4
5
6
7
8
9
10
11
12
13
14
15
16
17
18@Entry @Component class MyView { func build() { Column(10) { Image(@r(app.media.test_icon)) // 默认图片 .width(160) .height(90) Image(@r(app.media.test_icon)) // 使用commands参数起作用 .width(160) .height(90) .mask(PathShape(commands: "M0 0 L150 0 L300 150 L0 300 Z").fill(Color(0xff0000))) Image(@r(app.media.test_icon)) // 不使用commands不起作用 .width(160) .height(90) .mask(PathShape(width: 100, height: 90).fill(Color(0xff0000))) Image(@r(app.media.test_icon)) // 使用commands参数起作用 .width(160) .height(90) .mask(PathShape(width: 80, height: 45, commands: "M0 0 L150 0 L300 150 L0 300 Z").fill(Color(0xff0000))) } .padding(10) .width(100.percent) .height(100.percent) } }1
2
3
4
5
6
7
8
9
10
11
12
13
14
15
16
17
18
19
20
21
22
23
24
25
26
27样例运行结果如下图所示:
Rect:添加矩形遮罩,样例如下:
Image($r("app.media.test")) // 默认图片
  .width(160)
  .height(90)

Image($r("app.media.test")) // 全部遮罩
  .width(160)
  .height(90)
  .mask(new Rect({width: 160, height: 90}).fill(Color.Red))

Image($r("app.media.test")) // 部分遮罩
  .width(160)
  .height(90)
  .mask(new Rect({width: 90, height: 90}).fill(Color.Red))
1
2
3
4
5
6
7
8
9
10
11
12
13@Entry @Component class MyView { func build() { Column(10) { Image(@r(app.media.test_icon)) // 默认图片 .width(160) .height(90) Image(@r(app.media.test_icon)) // 全部遮罩 .width(160) .height(90) .mask(RectShape(width: 160, height: 90).fill(Color(0xff0000))) Image(@r(app.media.test_icon)) // 部分遮罩 .width(160) .height(90) .mask(RectShape(width: 90, height: 90).fill(Color(0xff0000))) } .padding(10) .width(100.percent) .height(100.percent) } }1
2
3
4
5
6
7
8
9
10
11
12
13
14
15
16
17
18
19
20
21
22样例运行结果如下图所示:
# 3.9.2:剪切设置
export declare class CommonMethod<T> {
  clip(value: boolean | Circle | Ellipse | Path | Rect): T;
}
2
3
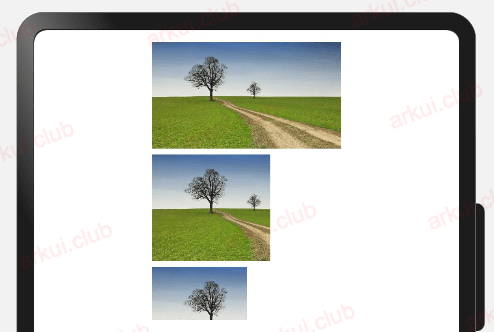
clip:按照指定形状对当前组件进行剪切,剪切的参考系为当前组件的左上角坐标,参数说明如下:
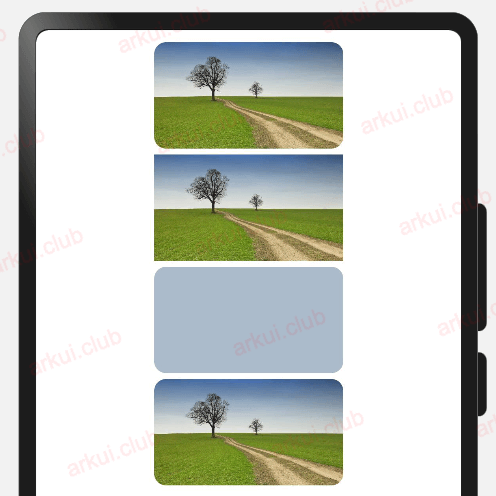
boolean:表示是否按照边缘轮廓进行裁剪,样例如下:
Image($r("app.media.test"))
  .width(160)
  .height(90)
  .borderRadius(10) // 设置圆角

Column() {
  Image($r("app.media.test"))
    .width(160)
    .height(90)
}
.borderRadius(10) // 设置圆角,无法对子组件生效

Column() {
}
.width(160)
.height(90)
.backgroundColor('#aabbcc')
.borderRadius(10) // 设置圆角,仅仅对自身起作用


Column() {
  Image($r("app.media.test"))
    .width(160)
    .height(90)
}
.clip(true)       // 设置可剪切,对所有子组件也起作用
.borderRadius(10) // 设置圆角
1
2
3
4
5
6
7
8
9
10
11
12
13
14
15
16
17
18
19
20
21
22
23
24
25
26
27@Entry @Component class MyView { func build() { Column(10) { Image(@r(app.media.test_icon)) .width(160) .height(90) .borderRadius(10) // 设置圆角 Column() { Image(@r(app.media.test_icon)) .width(160) .height(90) } .borderRadius(10) // 设置圆角,无法对子组件生效 Column() { } .width(160) .height(90) .backgroundColor(0xaabbcc) .borderRadius(10) // 设置圆角,仅仅对自身起作用 Column() { Image(@r(app.media.test_icon)) .width(160) .height(90) } .clip(true) // 设置可剪切,对所有子组件也起作用 .borderRadius(10) // 设置圆角 } .padding(10) .width(100.percent) .height(100.percent) } }1
2
3
4
5
6
7
8
9
10
11
12
13
14
15
16
17
18
19
20
21
22
23
24
25
26
27
28
29
30
31
32
33
34
35样例运行结果如下图所示:
📢:ArkUI开发框架允许子组件超出父组件的绘制范围,如果不希望超出可以使用该属性做下限制,样例如下所示:
Row() {
  Column() {// 没有设置 clip 属性,默认允许子组件超出父组件的绘制范围
    Text()
      .size({width: 20, height: 80})
      .backgroundColor(Color.Pink)
  }
  .height("100%")
  .layoutWeight(1)
  .backgroundColor("#aabbcc")

  Column() {// 设置 clip 属性为 true,允许子组件超出父组件的绘制范围
    Text()
      .size({width: 20, height: 80})
      .backgroundColor(Color.Pink)
  }
  .height("100%")
  .layoutWeight(1)
  .backgroundColor("#bbccaa")
  .clip(true)// 添加 clip 属性为 true,表示子组件的绘制范围不能超出父组件

  Column() {// 没有设置 clip 属性,默认允许子组件超出父组件的绘制范围
    Text()
      .size({width: 20, height: 80})
      .backgroundColor(Color.Pink)
  }
  .height("100%")
  .layoutWeight(1)
  .backgroundColor("#ccaabb")
}
.height(60)
.width("100%")
1
2
3
4
5
6
7
8
9
10
11
12
13
14
15
16
17
18
19
20
21
22
23
24
25
26
27
28
29
30
31@Entry @Component class MyView { func build() { Row() { Column() {// 没有设置 clip 属性,默认允许子组件超出父组件的绘制范围 Text("") .size(width: 20, height: 80) .backgroundColor(Color(0xffc0cb)) } .height(100.percent) .layoutWeight(1) .backgroundColor(0xaabbcc) Column() {// 设置 clip 属性为 true,允许子组件超出父组件的绘制范围 Text("") .size(width: 20, height: 80) .backgroundColor(Color(0xffc0cb)) } .height(100.percent) .layoutWeight(1) .backgroundColor(0xbbccaa) .clip(true)// 添加 clip 属性为 true,表示子组件的绘制范围不能超出父组件 Column() {// 没有设置 clip 属性,默认允许子组件超出父组件的绘制范围 Text("") .size(width: 20, height: 80) .backgroundColor(Color(0xffc0cb)) } .height(100.percent) .layoutWeight(1) .backgroundColor(0xccaabb) } .height(60) .width(100.percent) } }1
2
3
4
5
6
7
8
9
10
11
12
13
14
15
16
17
18
19
20
21
22
23
24
25
26
27
28
29
30
31
32
33
34
35样例运行结果如下图所示:
📢:由运行结果看,第 1 和第 3 个 Column 没有添加 clip 属性,则子组件的绘制区域可以超出父组件,第 2 个 Column 添加了 clip 并且属性值设置为true,则子组件超出父组件区域时被剪切到了。
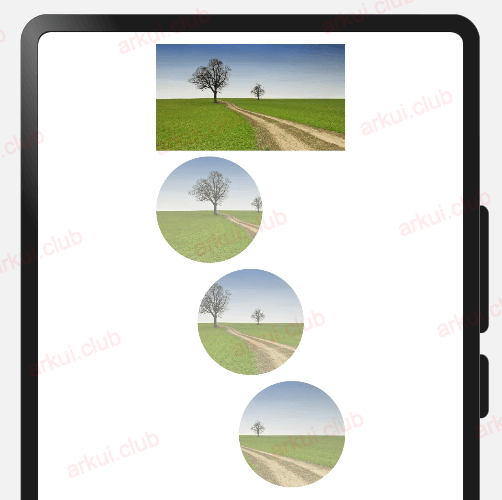
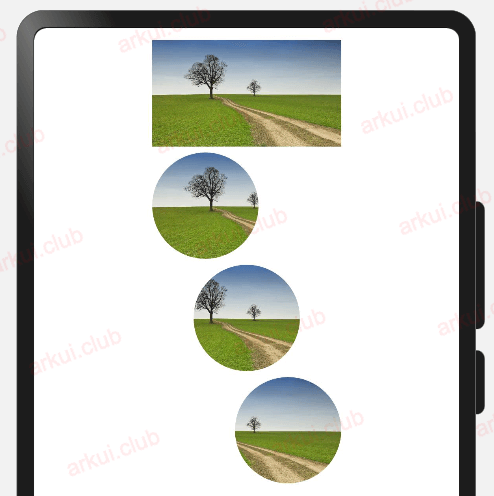
Circle:把组件剪切成圆形,样例如下所示:
Image($r("app.media.test"))  // 默认图片
  .width(160)
  .height(90)

Image($r("app.media.test"))   // 居左剪切出一个圆
  .width(160)
  .height(90)
  .clip(new Circle({width: 90, height: 90}).fill(Color.Pink))

Image($r("app.media.test"))   // 居中剪切出一个圆
  .width(160)
  .height(90)
  .clip(new Circle({width: 160, height: 90}).fill(Color.Pink))

Image($r("app.media.test"))   // 居右剪切出一个圆
  .width(160)
  .height(90)
  .clip(new Circle({width: 230, height: 90}).fill(Color.Pink))
1
2
3
4
5
6
7
8
9
10
11
12
13
14
15
16
17
18@Entry @Component class MyView { func build() { Column(10) { Image(@r(app.media.test_icon)) // 默认图片 .width(160) .height(90) Image(@r(app.media.test_icon)) // 居左剪切出一个圆 .width(160) .height(90) .clip(CircleShape(width: 90, height: 90).fill(Color(0xffc0cb))) Image(@r(app.media.test_icon)) // 居中剪切出一个圆 .width(160) .height(90) .clip(CircleShape(width: 160, height: 90).fill(Color(0xffc0cb))) Image(@r(app.media.test_icon)) // 居右剪切出一个圆 .width(160) .height(90) .clip(CircleShape(width: 230, height: 90).fill(Color(0xffc0cb))) } .padding(10) .width(100.percent) .height(100.percent) } }1
2
3
4
5
6
7
8
9
10
11
12
13
14
15
16
17
18
19
20
21
22
23
24
25
26
27样例运行结果如下图所示:
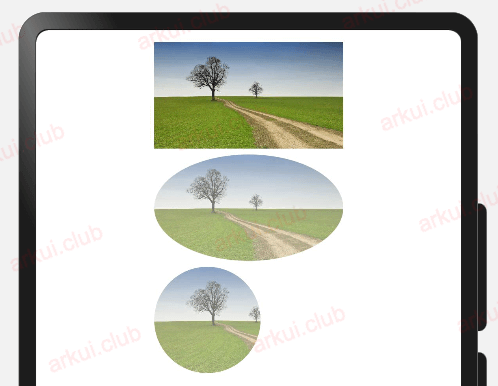
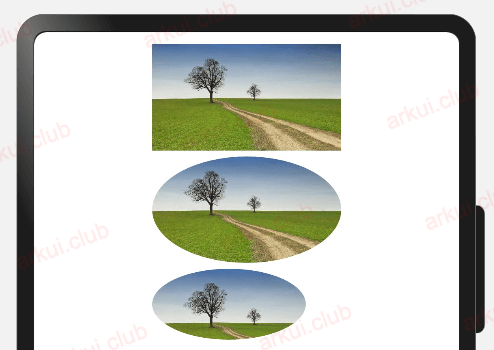
Ellipse:把组件剪切成椭圆形,样例如下:
Image($r("app.media.test"))  // 默认图片
  .width(160)
  .height(90)

Image($r("app.media.test"))   // 居左剪切出一个圆
  .width(160)
  .height(90)
  .clip(new Ellipse({width: 160, height: 90}).fill(Color.Pink))

Image($r("app.media.test"))   // 居中剪切出一个圆
  .width(160)
  .height(90)
  .clip(new Ellipse({width: 130, height: 60}).fill(Color.Pink))
1
2
3
4
5
6
7
8
9
10
11
12
13@Entry @Component class MyView { func build() { Column(10) { Image(@r(app.media.test_icon)) // 默认图片 .width(160) .height(90) Image(@r(app.media.test_icon)) // 居左剪切出一个圆 .width(160) .height(90) .clip(EllipseShape(width: 160, height: 90).fill(Color(0xffc0cb))) Image(@r(app.media.test_icon)) // 居中剪切出一个圆 .width(160) .height(90) .clip(EllipseShape(width: 130, height: 60).fill(Color(0xffc0cb))) } .padding(10) .width(100.percent) .height(100.percent) } }1
2
3
4
5
6
7
8
9
10
11
12
13
14
15
16
17
18
19
20
21
22样例运行结果如下图所示:
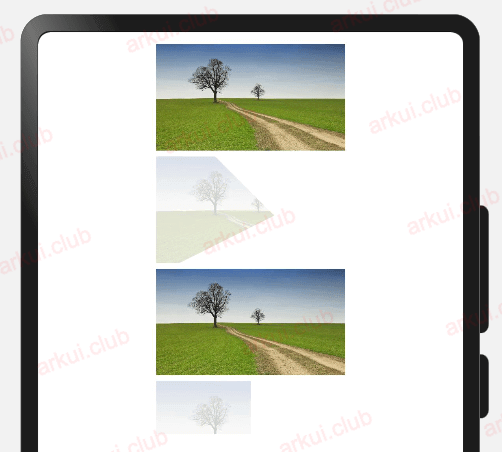
Path:把组件按照
Path剪切出对应形状,Path使用commands才生效果,样例如下:Image($r("app.media.test")) // 默认图片 .width(160) .height(90) Image($r("app.media.test")) // 使用commands参数起作用 .width(160) .height(90) .clip(new Path({commands: "M0 0 L150 0 L300 150 L0 300 Z"})) Image($r("app.media.test")) // 不起作用 .width(160) .height(90) .clip(new Path({width: 100, height: 90})) Image($r("app.media.test")) // 使用commands参数起作用 .width(160) .height(90) .clip(new Path({width: 80, height: 45, commands: "M0 0 L" + vp2px(80) + " 0 L" + vp2px(80) + " " + vp2px(45) + " L0 " + vp2px(45) + " Z"}))1
2
3
4
5
6
7
8
9
10
11
12
13
14
15
16
17
18@Entry @Component class MyView { func build() { Column(10) { Image(@r(app.media.test_icon)) // 默认图片 .width(160) .height(90) Image(@r(app.media.test_icon)) // 使用commands参数起作用 .width(160) .height(90) .clip(PathShape(commands: "M0 0 L150 0 L300 150 L0 300 Z")) Image(@r(app.media.test_icon)) // 不起作用 .width(160) .height(90) .clip(PathShape(width: 100, height: 90)) Image(@r(app.media.test_icon)) // 使用commands参数起作用 .width(160) .height(90) .clip(PathShape(width: 80, height: 45, commands: "M0 0 L150 0 L300 150 L0 300 Z")) } .padding(10) .width(100.percent) .height(100.percent) } }1
2
3
4
5
6
7
8
9
10
11
12
13
14
15
16
17
18
19
20
21
22
23
24
25
26
27样例运行结果如下图所示:
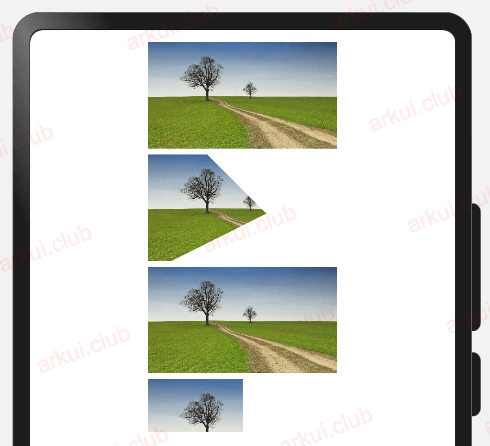
Rect:把组件按照指定区域剪切出对应形状,样例如下:
Image($r("app.media.test"))  // 默认图片
  .width(160)
  .height(90)

Image($r("app.media.test"))
  .width(160)
  .height(90)
  .clip(new Rect({width: 100, height: 90}))

Image($r("app.media.test"))
  .width(160)
  .height(90)
  .clip(new Rect({width: 80, height: 45}))
1
2
3
4
5
6
7
8
9
10
11
12
13@Entry @Component class MyView { func build() { Column(10) { Image(@r(app.media.test_icon)) // 默认图片 .width(160) .height(90) Image(@r(app.media.test_icon)) .width(160) .height(90) .clip(RectShape(width: 100, height: 90)) Image(@r(app.media.test_icon)) .width(160) .height(90) .clip(RectShape(width: 80, height: 45)) } .padding(10) .width(100.percent) .height(100.percent) } }1
2
3
4
5
6
7
8
9
10
11
12
13
14
15
16
17
18
19
20
21
22样例运行结果如下图所示:
