# 9.4:自定义对话框(Dialog)
对话框在APP中的使用非常普及,例如APP第一次启动时弹出的服务与隐私协议授权对话框,版本更新提示升级框等场景,ArkUI开发框架提供了全局对话框 AlertDialog ,但是每个 APP 都有自己的主题风格,当系统提供的对话框不符合我们的需求时,我们可以使用 CustomDialogController 实现自定义弹窗,本节笔者简单介绍一下自定义对话框的实现过程。
# 9.4.1:AlertDialog简单使用
AlertDialog 是 ArkUI开发框架提供的全局对话框,它提供了 show() 方法来展示一个对话框, show() 方法支持 1 个按钮和 2 个按钮的弹框,我们以 1 个按钮为例,样例代码如下所示:
@Entry @ComponentV2 struct DialogTest {

  build() {
    Column({space: 10}) {
      Button("按钮")
        .size({width: 160, height: 50})
        .onClick(() => {
          AlertDialog.show({                   // 点击按钮,弹出一个对话框
            title: "这里是标题",                 // 设置标题
            message: "这里是弹窗的内容",          // 设置内容
            alignment: DialogAlignment.Center, // 设置弹窗的对齐方式
            confirm: {                         // 单个按钮的配置文本
              value: "text",
              fontColor: Color.Red,
              backgroundColor: "#aabbcc",
              action: () => {
                console.log("点击了")
              }
            }
          })
        })
    }
    .padding(10)
    .size({width: "100%", height: '100%'})
  }
}
2
3
4
5
6
7
8
9
10
11
12
13
14
15
16
17
18
19
20
21
22
23
24
25
26
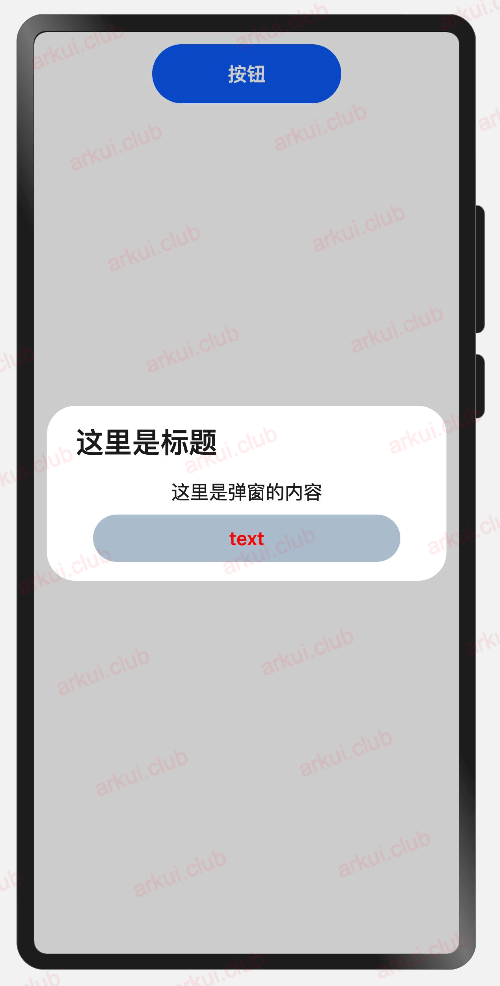
样例运行结果如下图所示:

根据运行效果看,如果 UI 设计的弹窗是其它样式,使用默认对话框是没办法做到的,ArkUI开发框架为解决这种场景提供了 CustomDialogController 接口,支持开发者自定义对话框。
# 9.4.2:CustomDialogController定义介绍
declare class CustomDialogController {
  constructor(value: CustomDialogControllerOptions); // 对话框控制器,控制弹框样式等
  open();                                            // 打开对话框
  close();                                           // 关闭对话框
}

// 配置参数的定义
declare interface CustomDialogControllerOptions {
  builder: any;                                      // 弹框构造器
  cancel?: () => void;                               // 点击蒙层的事件回调
  autoCancel?: boolean;                              // 点击蒙层是否自动消失
  alignment?: DialogAlignment;                       // 弹框在竖直方向上的对齐方式
  offset?: Offset;                                   // 根据alignment的偏移
  customStyle?: boolean;                             // 是否是自定义样式
  gridCount?: number;                                // grid数量
}
2
3
4
5
6
7
8
9
10
11
12
13
14
15
16
CustomDialogController 定义了 open() 和 close() 方法,它们说明如下:
- open:打开对话框,如果对话框已经打开,则再次打开无效。
- close:关闭对话框,如果对话框已经关闭,则再次关闭无效。
- value:创建控制器需要的配置参数,
CustomDialogControllerOptions说明如下:- builder:创建自定义弹窗的构造器。
- cancel:点击蒙层的事件回调。
- autoCancel:是否允许点击遮障层退出。
- alignment:弹窗在竖直方向上的对齐方式。
- offset:弹窗相对
alignment所在位置的偏移量。 - customStyle:弹窗容器样式是否自定义。
自定义对话框本质上也是自定义 UI 组件,只是自定义弹窗使用的修饰符为 @CustomDialog ,其它方面和自定义组件的流程是一致的,自定义弹窗布局代码如下所示:
@CustomDialog struct CustomBatteryDialog {

  private controller: CustomDialogController; // 定义controller

  build() {
    Stack() {
      Column() {
        Text('电池电量不足')
          .fontSize(20)
          .margin({top: 15})
        Text('还剩20%电量')
          .fontSize(16)
          .margin({top: 3})
        Text()
          .size({width: "100%", height: "2px"})
          .backgroundColor("#bebbc1")
          .margin({top: 15})
        Row() {
          Text("关闭")
            .height("100%")
            .layoutWeight(1)
            .textAlign(TextAlign.Center)
            .fontSize(18)
            .fontColor("#317ef5")
            .onClick(() => {
              this.controller.close(); // 关闭弹窗
            })
          Text()
            .size({width: "2px", height: "100%"})
            .backgroundColor("#bebbc1")
          Text("低电量模式")
            .textAlign(TextAlign.Center)
            .fontSize(18)
            .fontColor("#317ef5")
            .height("100%")
            .layoutWeight(1)
            .onClick(() => {
              this.controller.close(); // 关闭弹窗
            })
        }
        .height(45)
        .width('100%')
      }
      .backgroundColor("#e6ffffff")
      .borderRadius(20)
    }
    .padding({left: 40, right: 40})
    .width("100%")
  }
}
2
3
4
5
6
7
8
9
10
11
12
13
14
15
16
17
18
19
20
21
22
23
24
25
26
27
28
29
30
31
32
33
34
35
36
37
38
39
40
41
42
43
44
45
46
47
48
49
50
CustomArkDialog 的布局很简单,仿照的是 iOS 的低电量弹窗,需要注意的使用 @CustomDialog 修饰符创建的组件,内部必须要定义一个 CustomDialogController 类型的属性,该属性的初始化由ArkUI框架自动完成,不需要开发者手动进行初始化操作,这样做的目的是方便开发者控制弹窗的显示和关闭,另外对属性的访问权限不做要求,如果不定义该属性,在项目编译的时候会抱如下异常:
[Compile Result] @CustomDialog component should have a property of the CustomDialogController type.
定义完了 CustomArkDialog 后,紧接着使用 CustomDialogController 来创建自定义弹框。
# 9.4.3:CustomDialogController使用介绍
使用 CustomDialogController 的样例代码如下所示:
@Entry @ComponentV2 struct Index {

  // 创建一个controller
  controller: CustomDialogController = new CustomDialogController({
    builder: CustomBatteryDialog(), // 弹框的构造器
    cancel: () => {
      console.log("cancel")         // 点击蒙层的回调
    },
    autoCancel: true,               // 允许点击蒙层关闭弹窗
    customStyle: true               // 使用自定义样式
  });

  build() {
    Column({space: 10}) {
      Button("按钮")
        .size({width: 160, height: 50})
        .onClick(() => {
          this.controller.open()    // 打开弹窗
        })
    }
    .padding(10)
    .size({width: "100%", height: '100%'})
  }
}
2
3
4
5
6
7
8
9
10
11
12
13
14
15
16
17
18
19
20
21
22
23
24
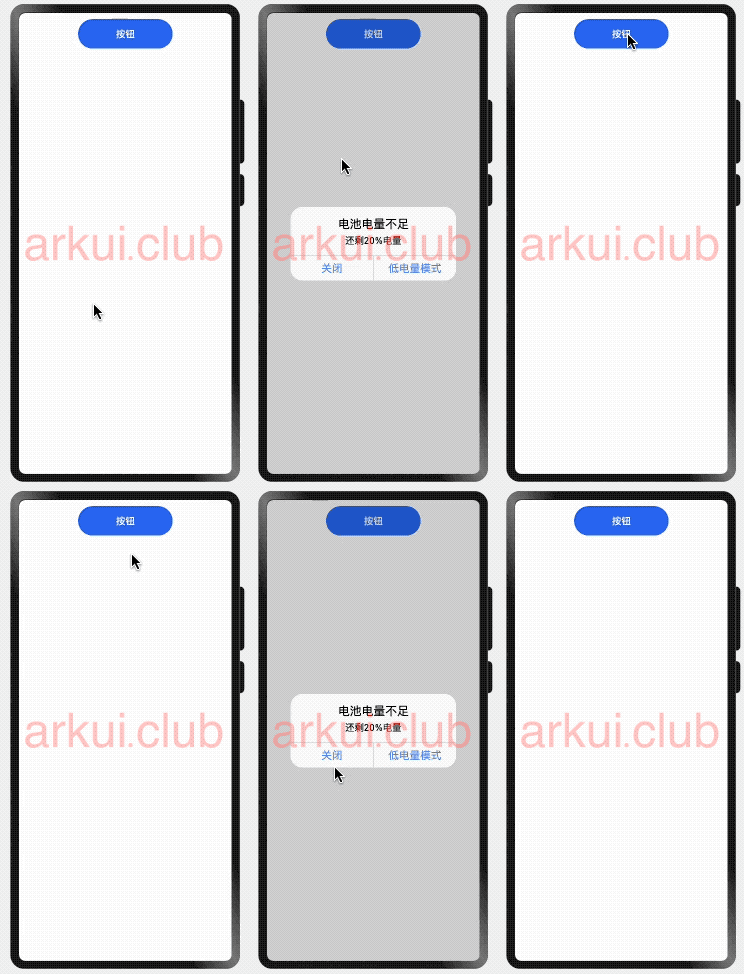
运行结果如下图所示:

本样例的实现很简单,并没有实现复杂的事件和属性支持等功能,目的是给读者演示一下自定义弹窗的使用流程,读者可以在此基础上实现更丰富功能,比如支持设置点击事件的回调,文本样式啥的,套路和前两节的是一样的,笔者就不再详述了。
# 9.4.4:小结
本节简单向读者介绍了自定义弹窗的使用,核心点就是使用 CustomDialogController 和自定义布局实现,期待读者掌握了用法后可以实现各种绚丽弹窗并开源出来,大家一起共建 OpenHarmony 生态。

