# 12.2:网络请求
APP绝大多数都是需要网络请求来加载数据的,ArkUI开发框架在 @kit.NetworkKit 模块提供了网络请求相关 API,本节笔者简单介绍一下网络请求相关 API 的使用。
# 12.2.1:限制与约束
DevEco Studio 的 预览器暂不支持网络请求,只能在模拟器或真机上进行。
发起 http 网络请求需要申请 ohos.permission.INTERNET 权限。
发起 http 网络请求限定并发个数为 100 ,超过这一限制的后续请求会失败。
默认支持
https,如果要支持http,需要在config.json里增加network标签,属性标识 "cleartextTraffic": true。{ "deviceConfig": { "default": { "network": { "cleartextTraffic": true // 允许http请求 } ... } } ... }1
2
3
4
5
6
7
8
9
10
11📢:DevEco Studio 的预览器暂时不支持网络请求,只能在模拟机或真机上进行。
# 12.2.2:http定义介绍
declare namespace http {
  // 创建HttpRequest
  function createHttp(): HttpRequest;

  // HttpRequest接口
  export interface HttpRequest {
    // 发起请求
    request(url: string, callback: AsyncCallback<HttpResponse>): void;
    // 发起请求
    request(url: string, options: HttpRequestOptions, callback: AsyncCallback<HttpResponse>): void;
    // 终端请求
    destroy(): void;
    // 监听headerReceive时间
    on(type: "headerReceive", callback: AsyncCallback<Object>): void;
    // 取消监听headerReceive
    off(type: "headerReceive", callback?: AsyncCallback<Object>): void;

    // 省略部分API
  }

  // 省略部分API
}

export default http;
2
3
4
5
6
7
8
9
10
11
12
13
14
15
16
17
18
19
20
21
22
23
24
@kit.NetworkKit 模块定义的API注释的很清晰,首先调用 createHttp() 方法获取一个 HttpRequest 实例,然后调用 HttpRequest 的 request() 方法发送网络请求。
# 12.2.3:发起网络请求
使用 @kit.NetworkKit 模块发起网络请求分为以下步骤:
引入http模块
import { http } from '@kit.NetworkKit';1创建一个httpRequest
let httpRequest = http.createHttp();1发起http请求
httpRequest提供了两种request()方法进行网络请求,分别是无RequestOptions参数的请求和有RequestOptions参数的请求。分别介绍如下:无
RequestOptions参数请求httpRequest.request( "https://www.baidu.com", // 请求的URL (error, data) => { // 请求的回调 // todo } )1
2
3
4
5
6📢:
request()方法默认采用get方式请求,header默认是 application/json。带
RequestOptions参数请求httpRequest.request( "https://www.baidu.com", // 请求的URL { method: RequestMethod.RequestMethod.POST, // 设置请求方法 header: { 'Content-Type': 'application/json' // 添加Header,header 默认值就是application/json }, readTimeout: 15000, // 超时时间 connectTimeout: 15000, // 超时时间 extraData: "extra data" // 发送请求的额外数据 }, (error, data) => { // todo } )1
2
3
4
5
6
7
8
9
10
11
12
13
14
15📢:
RequestOptions的 header 默认为application/json类型,如果读取网页等其它数据需要更改 header 的值。
监听Response Header 事件。
httpRequest提供了
on()和off()方法用来监听Response Header事件的回调,httpRequest.on("headersReceive", (headers) => { // todo }) httpRequest.off("headersReceive", (headers) => { // todo })1
2
3
4
5
6
7中断http请求
httpRequest.destroy();1
# 12.2.4:完整样例
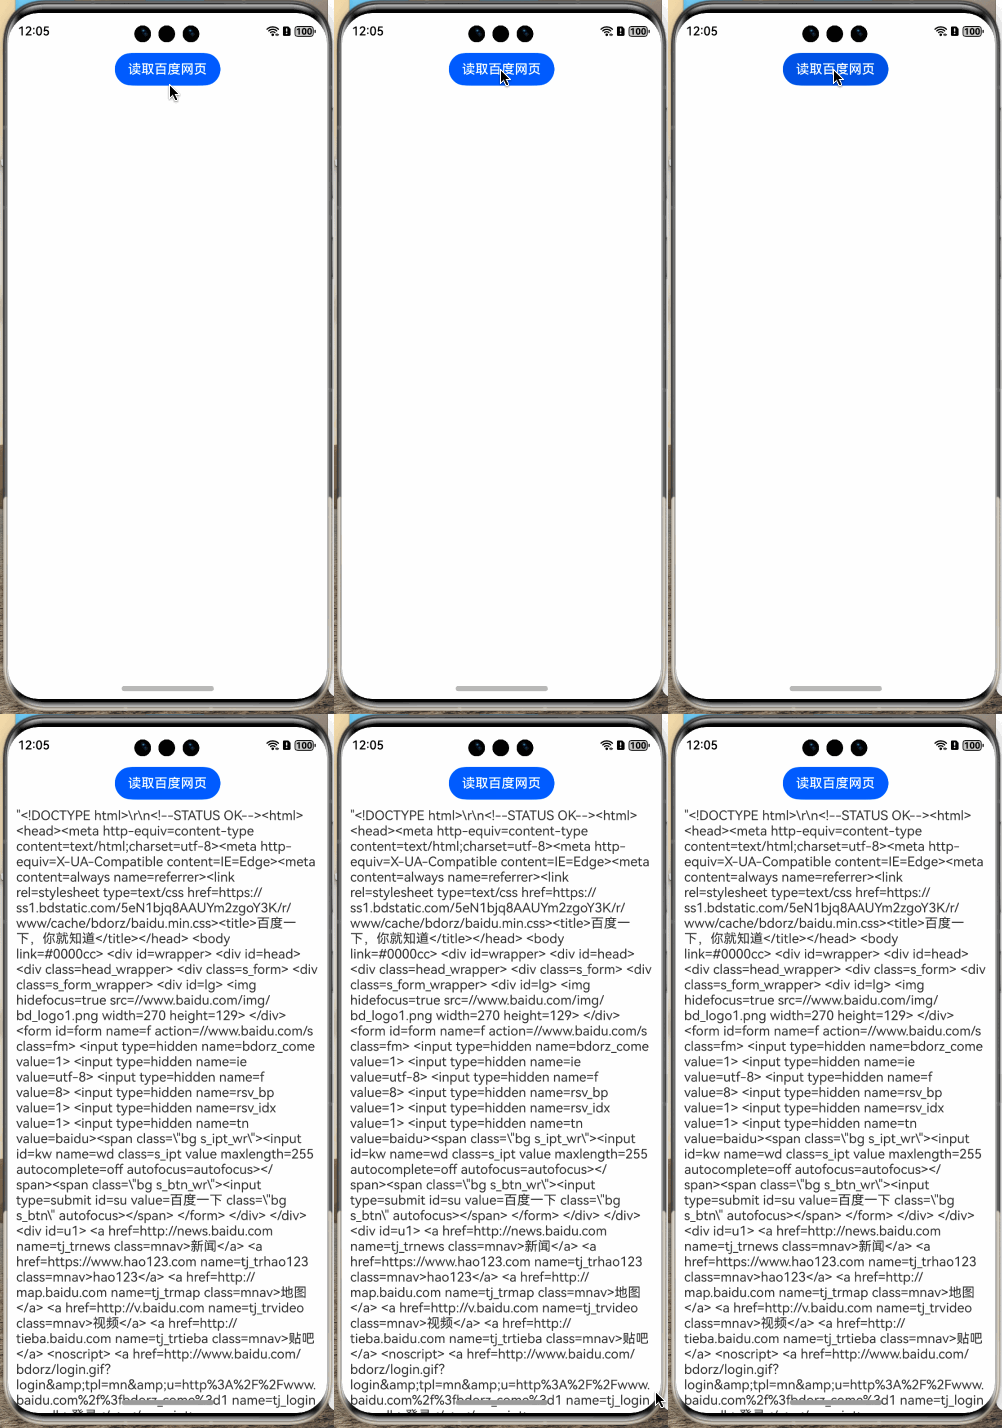
我们实现一个读取百度首页html的例子,样例结果如下图所示:

点击“获取百度首页”按钮后,会请求百度首页,请求成功后,我们将返回内容显示出来并在控制台打印响应 header ,代码如下:
import { http } from '@kit.NetworkKit';

@Entry @Component struct Index {

  @State html: string = "";

  build() {
    Column({space: 10}) {
      Button("读取百度网页")
        .onClick(() => {
          this.httpRequest();
        })
      Text(this.html)
    }
    .width('100%')
    .height('100%')
    .padding(10)
  }

  private httpRequest() {
    let httpRequest = http.createHttp();
    httpRequest.request(
      "https://www.baidu.com",
      {
        method: http.RequestMethod.GET,
        header: {
          'Content-Type': 'text/plain' // 系统默认Content-Type为application/json,读取网页需要设置为文本text/plain或者text/html
        },
        readTimeout: 15000,
        connectTimeout: 15000
      },
      (error, data) => {
        if(error) {
          console.log("error code: " + error.code + ", msg: " + error.message)
        } else {
          let code = data.responseCode
          if(http.ResponseCode.OK == code) {
            this.html = JSON.stringify(data.result);
            let header= JSON.stringify(data.header);
            console.log("result: " + this.html);
            console.log("header: " + header);
          } else {
            console.log("response code: " + code);
          }
        }
      }
    );
  }
}
2
3
4
5
6
7
8
9
10
11
12
13
14
15
16
17
18
19
20
21
22
23
24
25
26
27
28
29
30
31
32
33
34
35
36
37
38
39
40
41
42
43
44
45
46
47
48
49
日志打印如下:
app Log: result: "<!DOCTYPE html>\n<html class=\"\"><!--STATUS OK--><head>……
app Log: header: {"Cache-Control":["no-cache"],"Connection":["keep-alive"],……
2
← 12.1:文件操作 12.3:文件上传下载 →

